
4.数据库配置
本数据库仅做练习演示之用。创建部门表如下:
sql
create database qk;
use qk;

-- 部门表
create table dept(
    id          int unsigned primary key auto_increment comment '部门id,主键',
    name        varchar(10)      not null unique comment '部门名称',
    status      tinyint unsigned not null default 1 comment '状态:0-停用,1-正常',
    create_time datetime         not null comment '创建时间',
    update_time datetime         not null comment '修改时间'
) comment '部门信息表';
4.1.创建实体类
先将Mybatisplus的版本扩展加入到父工程的pom.xml文件中,需要增加的代码如下起始站和结束点所示:
xml
<?xml version="1.0" encoding="UTF-8"?>
<project xmlns="http://maven.apache.org/POM/4.0.0"
         xmlns:xsi="http://www.w3.org/2001/XMLSchema-instance"
         xsi:schemaLocation="http://maven.apache.org/POM/4.0.0 http://maven.apache.org/xsd/maven-4.0.0.xsd">
    <modelVersion>4.0.0</modelVersion>

    <properties>
        <!-- 依赖版本增加的配置的起始点 -->
        <!-- 锁定Mybatisplus和对应分页的版本 -->
        <mybatis-version>3.5.15</mybatis-version>
        <!-- 依赖版本增加的配置的结束点 -->
    </properties>

    <!--依赖版本管理-->
    <dependencyManagement>
        <dependencies>
            <!-- 依赖版本增加的配置的起始点 -->
            <!--mybatis-plus-->
            <dependency>
                <groupId>com.baomidou</groupId>
                <artifactId>mybatis-plus-spring-boot3-starter</artifactId>
                <version>${mybatis-version}</version>
            </dependency>

            <!--mybatis-plus分页插件依赖(3.5.9+版本需要单独引入)-->
            <dependency>
                <groupId>com.baomidou</groupId>
                <artifactId>mybatis-plus-jsqlparser</artifactId>
                <version>${mybatis-version}</version>
            </dependency>
            <!-- 依赖版本增加的配置的结束点 -->
        </dependencies>
    </dependencyManagement>
</project>
4.2.增加依赖,同时附带分页插件
然后再qk-entity模块的pom.xml文件中加入下面的配置下载依赖(由于我们已经在父工程锁定了版本,因此这里可以去掉version字段):
xml
<dependencies>
    <!--mybatis-plus-->
    <dependency>
        <groupId>com.baomidou</groupId>
        <artifactId>mybatis-plus-spring-boot3-starter</artifactId>
    </dependency>

    <!--mybatis-plus分页插件依赖(3.5.9+版本需要单独引入)-->
    <dependency>
        <groupId>com.baomidou</groupId>
        <artifactId>mybatis-plus-jsqlparser</artifactId>
    </dependency>
</dependencies>
注意
注: 需要大家自己将版本控制加入到父工程中, 后期关于子模块引入新的坐标需要在父容器中管理坐标版本相关的不再提醒!!!
根据上述创建的部门表的表结构,创建对应的实体类Dept,最终Dept部门实体类代码如下:
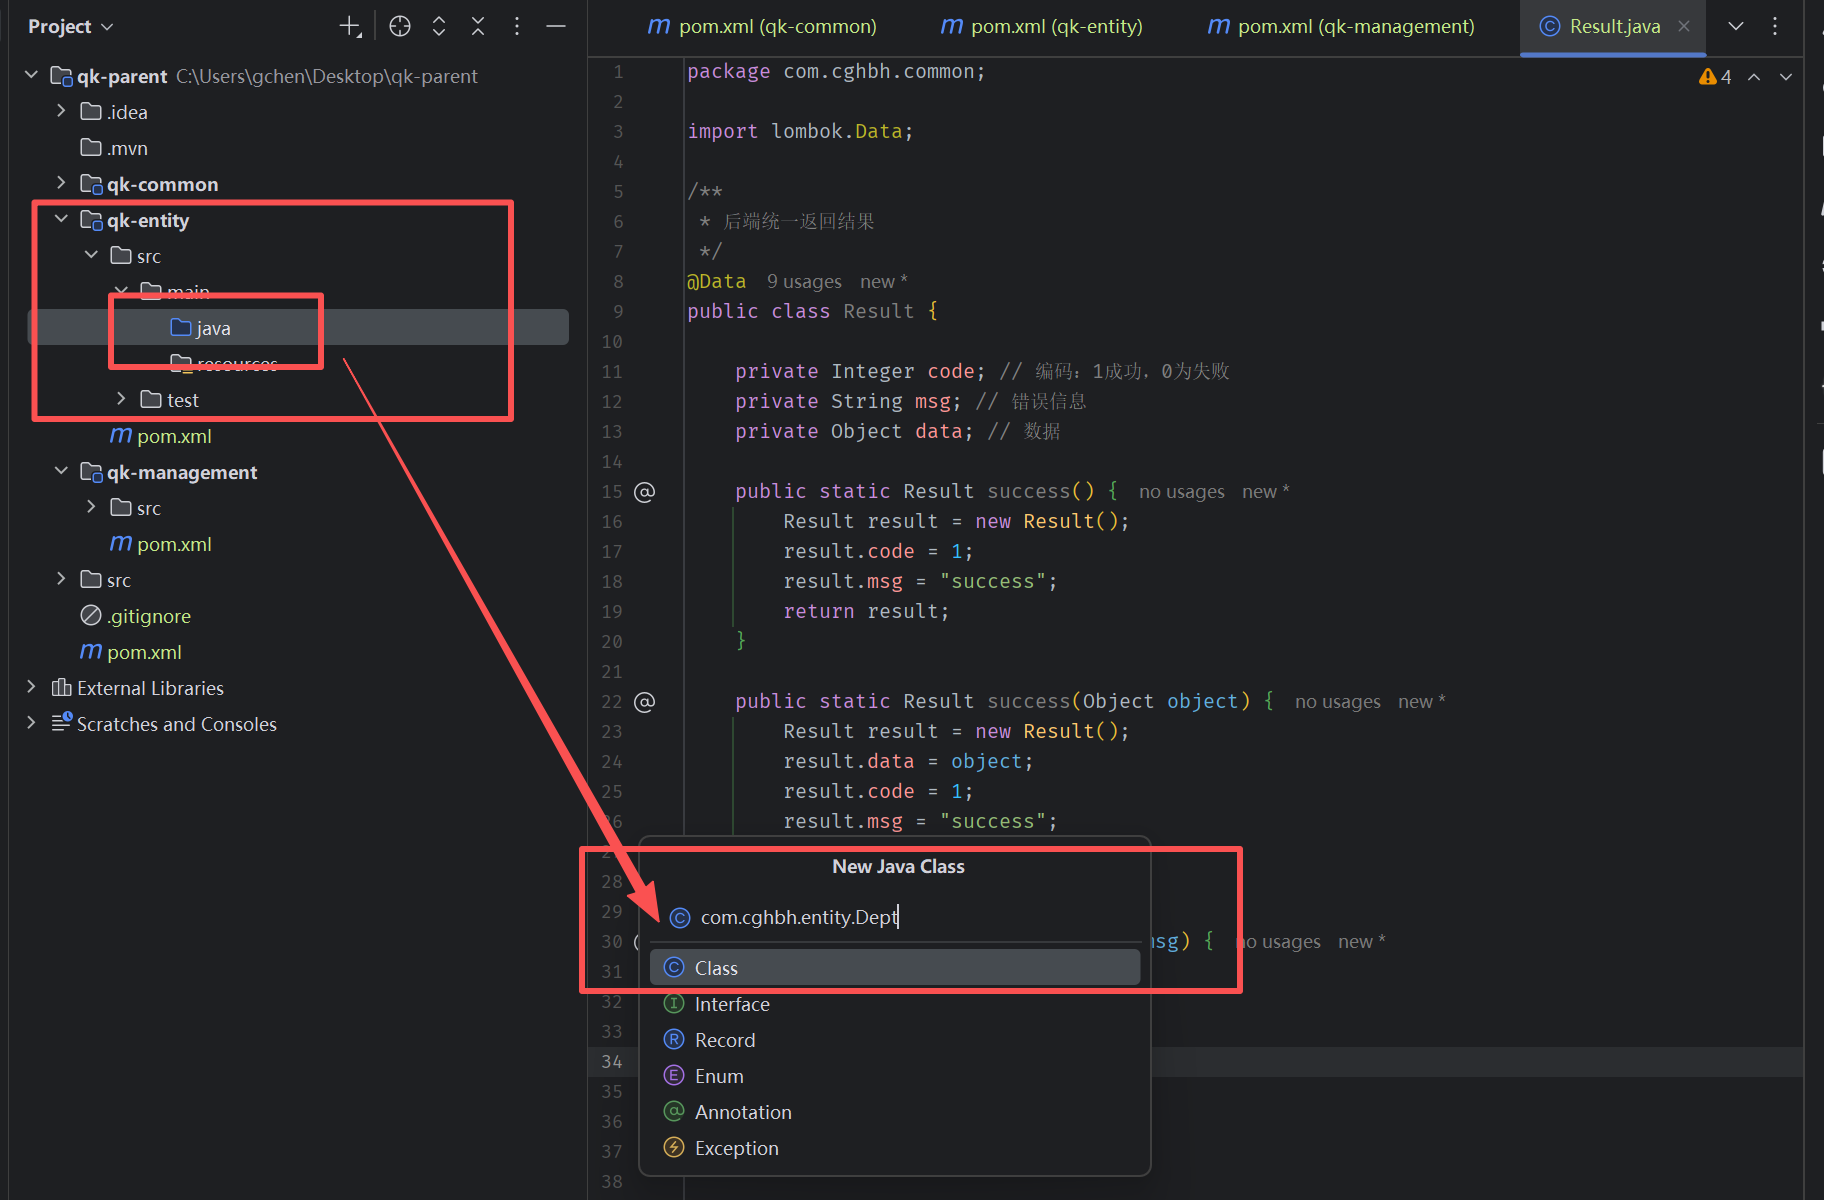
下面是最终的实体类代码:
java
package com.cghbh.entity;

import com.baomidou.mybatisplus.annotation.IdType;
import com.baomidou.mybatisplus.annotation.TableId;
import com.baomidou.mybatisplus.annotation.TableName;
import lombok.AllArgsConstructor;
import lombok.Data;
import lombok.NoArgsConstructor;

import java.time.LocalDateTime;

@Data
@NoArgsConstructor
@AllArgsConstructor
@TableName("dept")
public class Dept {
    @TableId(type = IdType.AUTO)
    private Integer id;
    private String name;
    private Integer status;
    private LocalDateTime createTime;
    private LocalDateTime updateTime;
}
4.2.增加配置
在 qk-management 模块中,创建一个 application.yml 配置文件,来配置数据库连接的信息。
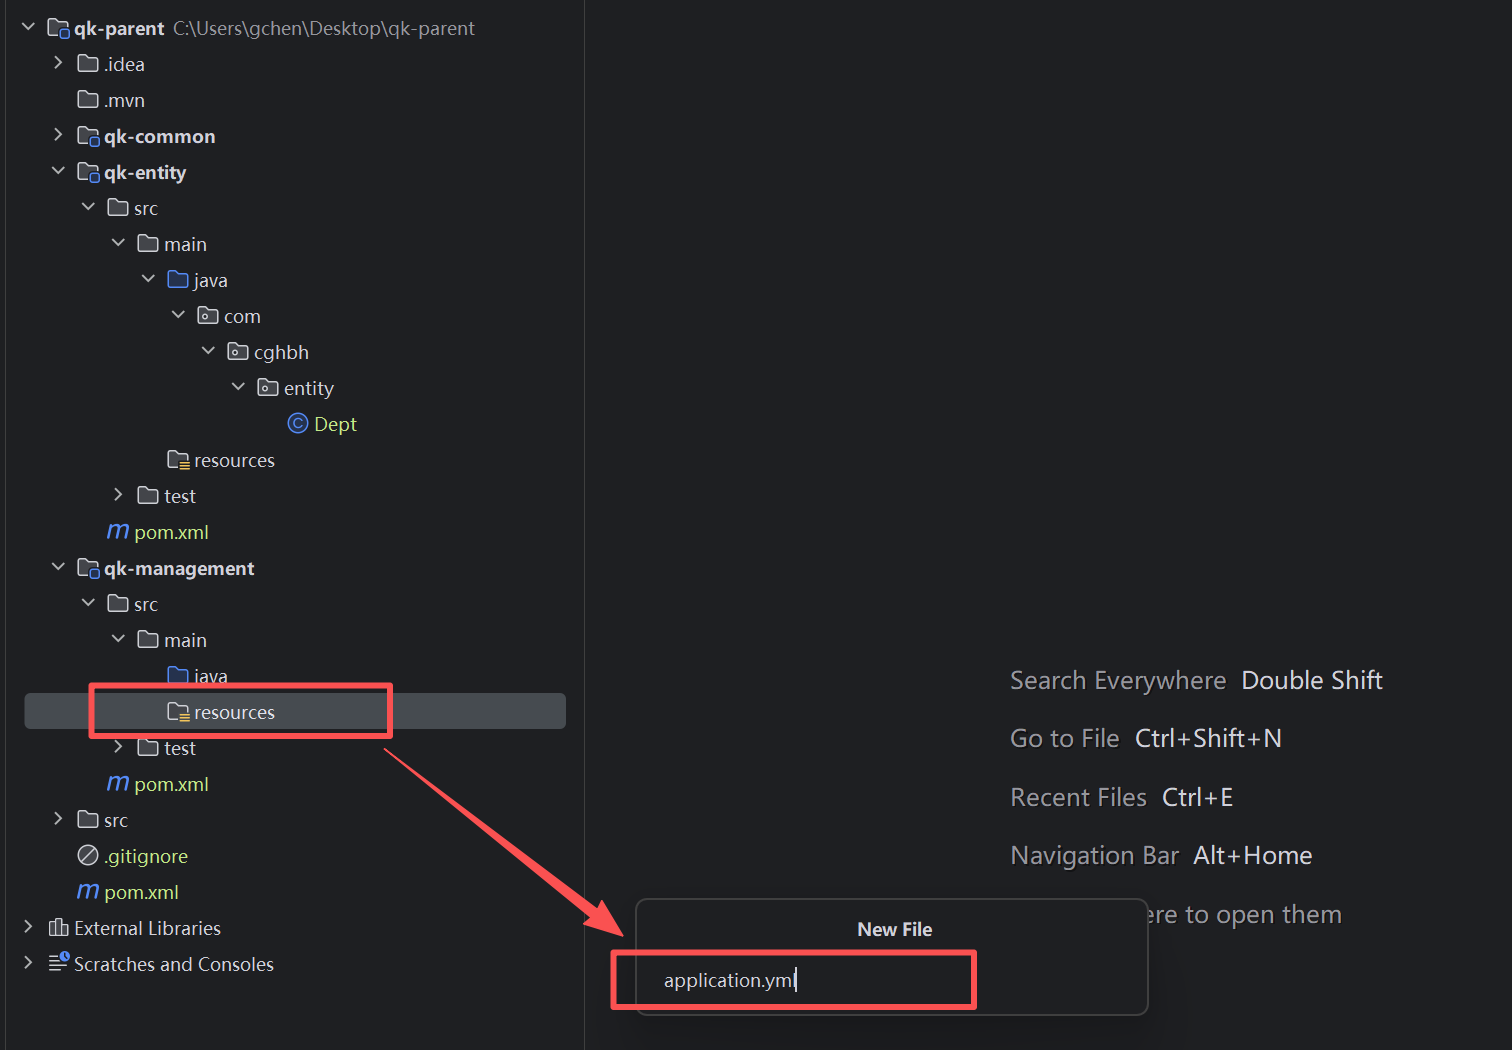
具体配置如下:
yml
#数据库连接信息
spring:
  datasource:
    driver-class-name: com.mysql.cj.jdbc.Driver
    url: jdbc:mysql://localhost:3306/qk
    username: 数据库用户名
    password: 你的密码

#mybatis-plus配置
mybatis-plus:
  configuration:
    map-underscore-to-camel-case: true  # 开启驼峰命名
    log-impl: org.apache.ibatis.logging.stdout.StdOutImpl # 打印sql
  global-config:
    db-config:
      id-type: auto # 全局主键策略 数据库自增
  mapper-locations: classpath*:/mappers/*.xml # 映射文件位置,后续写xml的时候存放的路径,一般也放在resources的mappers目录下